Note to Self: triple the time needed to hand sew ANYTHING!
Ahh, Tim's doublet. I will apologize now that this part of the journal is mostly an arduous journey through teaching myself how to do a very authentic Jacobean early 16-teens doublet. I want to make sure I do NOT have this many problems in the future, so I kept prodigious notes. I hope these will help me and others make the next one, a much easier task. :-)

This is Tim's silk brocade from Europe. It is an exceptional fabric in black, off-white, and gray. Really lovely to work with. The only problem? We had just barely enough fabric to make this doublet! No pressure...
In the making of this doublet I was using a combination of a physical pattern from Reconstructing History, and the pattern for Richard Cotton's doublet in Janet Arnold's Patterns of Fashion 1560-1620. I wanted the shapes of the book with the easier sizing from not having to do all that work myself. Of course, that is what led to the eventual difficulties.
Tim, Eide his wife, and I were able to do our remote fitting using Skype. This was really fantastic, as it allowed me to see what they were doing and we could discuss it. I did all the hard shaping and fitting with the lining. I completely forgot to get pictures of this part. I apologize. My lining was black middle-weight linen. I interlined and stiffened this layer with a crisp canvas and padded it with black wool felt that I hand pad-stitched into place. In the body, I made the two triangular boned belly pieces with their tabs that would be used to ease the stress from the button-holes, much like a petersham in Victorian bodices. All the interlining has it's seam allowances removed and you hand stitch it in place. Once the fit is fixed you turn your lining's seam allowance over it and tack it in place. The only machine stitching in the entire doublet is the side and shoulder seams and then I constructed the picadils with the machine (otherwise I would still be sewing them!) This makes the lining do all the work and allows the outer pretty fabric to be stretched over the lining and hand sewn in place. It looks magnificent when complete...but...
Okay the lining process went splendidly. It fit well, there was enough ease left for movement, but still snug enough for shape...lets cut the silk!
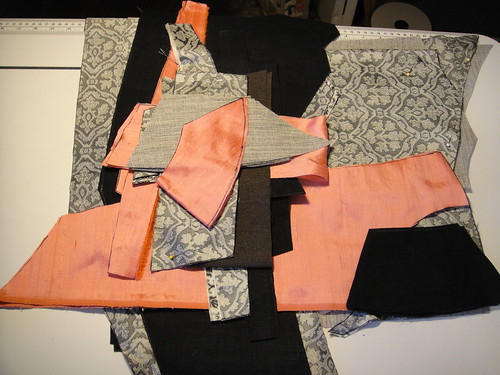
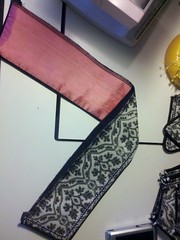
You are looking at the back side of the brocade, the salmon dupioni as facings, the haircanvas and black linen as flat-linings. I opted to flat-line all the silk as a precaution against its thinness showing the inner padding and boning lines. All the brocade was flat-lined in hair canvas and the dupioni in linen. I also made 12 yards of fine piping out of the black silk taffeta. This was going to edge all the picadils, collar, sleeves, and accentuate the seams.
I machined all the little pieces together and put the trim on the picadils. Picadils can so easily get warped and twist, so I wanted the machine stitching to keep them nice and solid. Also I knew it wouldn't really show there. The collar on the other hand, I put the trim on by hand because 1) I wasn't smart enough to put it on before assembly, and 2) I didn't want the stitches to show on the front. Which they wouldn't have if I had remembered step 1! I next stitched the facings to the outside of the lining and wrapped its seam allowances to the inside as well.
The assembly of the silk doublet went well. I got all the small pieces (collar, picadils, and wings) attached and everything appeared to fit well. So let's attach it to the lining! I was feeling pretty cocky at this point because everything had gone so smoothly. This would be where everything got hairy.

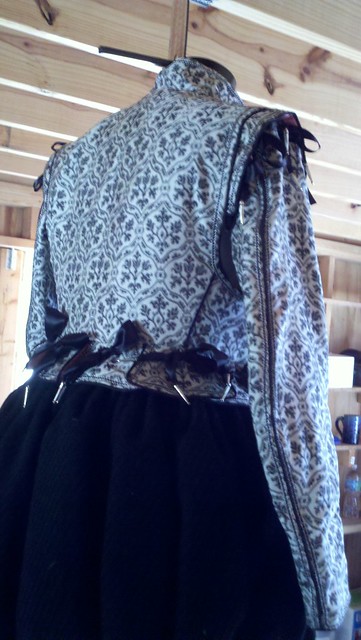
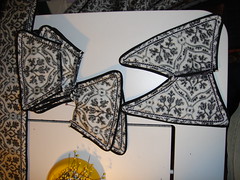
These are the only two images I took before I started pulling out my hair and swearing...a lot.
Everything looks okay, but the really big deal is the front and picadils. Notice how nice and even the bottom edges of the picadils are? Notice how the forward point of the picadil swings so far forward? PROBLEM!!!
I will blame the "not noticing earlier" part on being sick, but really this is so rooky, I am almost embarrassed to admit it, but so few doublets from this era get made that I think it is easy to make this mistake. On Elizabethan picadils the front points are elongated but not as extremely as these. I also trusted a little too much to my paper pattern. Reconstructing History makes great patterns, but the instructions are awful. They are not detailed enough, and do not explain stranger points of period construction. I had many emails back and forth with questions. One I missed, was that the lower hem is NOT the correct shape! The boned belly pieces have a very extreme curve, but it isn't the same as the doublet. In the JA book they are, but I didn't notice that till later when the "fixing" had to start.
The point, you ask? Well for the front picadils to come together on that straight edge and not overlap too much, the lower hem of the entire doublet has to curve way up at a very extreme angle so that the front edge has a sharp point. Mine did not. It looked good, but was WRONG. Make 2 new picadils, you say? Nope, not enough fabric for them to match. -sigh-
Now realize I figured all this out after I fixed a slight weirdness at the back arm hole, and had hand-sewn the doublet to the lining all the way around and at the armscyes. I only had this bottom edge left and I could do the button-holes...totally on schedule. Nope.
I had to tear all the front away, remove 3/4 of an inch from the button edge, which involved unpicking the lining and moving back the boned belly piece, and reshaping the front angles of both the lining and the silk doublet. This meant removing all the picadils I had already HAND-stitched in. OMG!
I had to angle my point up 2 inches to get the correct arc. I had already put a 10 hour day in when I thought I was so close to finishing. This added another 6.
I finally get the angle correct, all the picadils reattached, the fronts re-closed, and the lining attached. I can now start the hand eyelets and button holes. The only hitch here is that I should have cut back the crisp canvas from my button hole edge. It was a bitch to sew through and doubled the time for button holes. The ones on the sleeves took me 12.5 minutes, the doublet 30 minutes each. Gah!
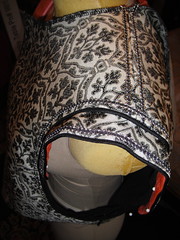
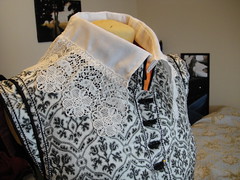
This picture is the next day, just before starting the eyelets and buttonholes. You can just see the yellow heads of my pins marking where to do the eyelets. I marked the doublet and the slops at the same time.
There is some really amusing padding on my dress form to make it more man shaped. It took 5 towels. :-)
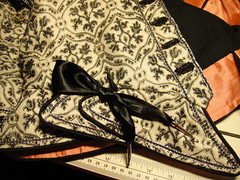
The little black loops are for the sword belt. They will hopefully keep it from riding up. It sits above the bows.
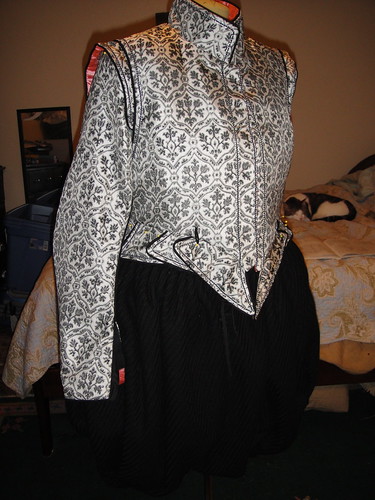
I love how you can see the bits of salmon silk poking out. It is really very striking.
Okay so on to the hand closures. I did large eyelets all the way around the doublet through the picadils for the bows. They are made of double faced satin with silver aglets. The eyelets had to be big enough for the aglets to get through.
These eyelets are at the front where they had to overlap for the ribbons to come up from the slops. One picadil had to have three eyelets for this to all work, but all the rest got two. The single looped bow looked best, and you can see the completed buttonholes.
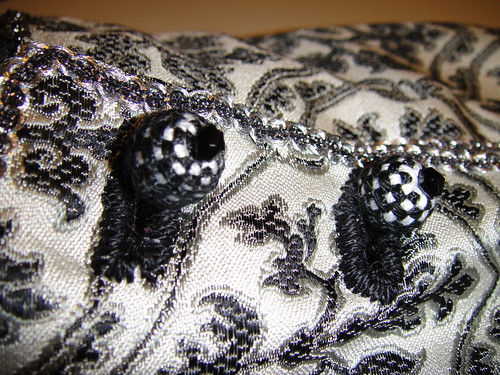
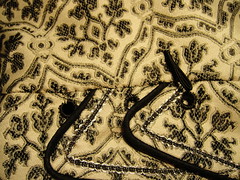
This is a close-up of the buttons on a finished sleeve. The added black glass bead really finishes off the button.
Okay, on to the accessories.
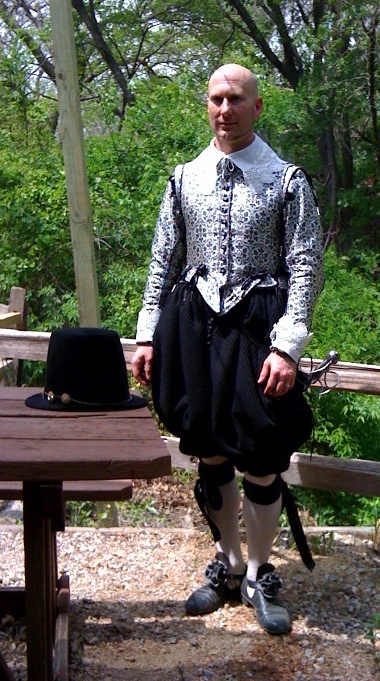
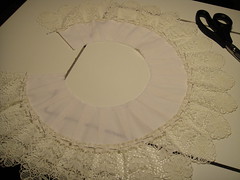
I was making a falling band and cuff set, and a set of shoe roses. If you will notice the image at the bottom this suit is based on, he has huge shoe roses edged in silver so I was going to do that, too.
Left: This is a falling band.
Right: This is not.
Left: This took me 1.5 hours to make with the cuffs...on-the-machine.
Right: This took me 8 hours. I stitched the entire thing by hand. (no cuffs)
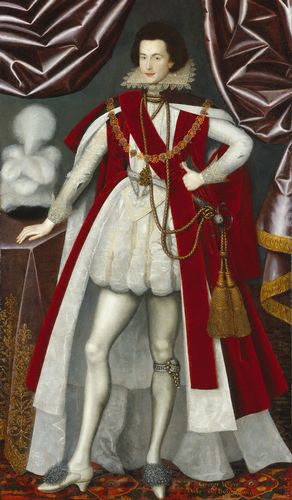
The piece I made that is NOT a falling band is called a ribata. You can see a portrait here of George Villiers the Duke of Buckingham wearing one. These are perfectly appropriate for the 16-teens that we were putting Tim's doublet in. Unfortunately they require a wire support. I just spent 8 hours reproducing the wrong pattern out of the new JA book of collars and such. I almost threw it away in my frustration, but opted to keep it. I think I could make a wire ribata out of millinery wire, add more lace, starch the crap out of it, and Tim could have himself an even more excruciatingly period and probably horribly uncomfortable neck treatment. -grin- This will appeal to him. I just know it.
The next morning, I gave in and remade the falling band and cuffs with my machine in an hour and a half.
So there!
The finished cuff.
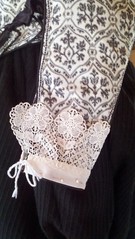
I found this lovely vintage lace online. I should find out how much more she has, and buy it all. It is really just beautiful.
Unfortunately I forgot to take pictures of the shoe roses. I also completely forgot to ship them. So, after having to overnight the suit, to get it to Tim on time, I also had to overnight the roses. He did actually get them, and liked them to pieces. He should be wearing them today at Scarborough Fair. It is their opening weekend. I am looking forward to some really fabulous photos of Tim and Eide all dressed up. As soon as I have those I will add them here. Until then here are a couple of photos that I took just before I packed the suit to ship. The bows are all tied. The sleeves are attatched and it is ready to go.
This suit is very neutral, so Tim and I look forward to adding other pieces to it. A cape or coat perhaps, or maybe a pinked doublet. I also look forward to the next one being much, much, easier.
Did I mention that I had to go buy a new grommet setter when I realized that I forgot mine in OH? Yup, sure did, on the shipping day no less. This is after Tim let me set grommets on the slops since they wouldn't show. It all worked out in the end, but geez! I do not know what karma I was working off. -shrug-
This project is most definitely off the table!