
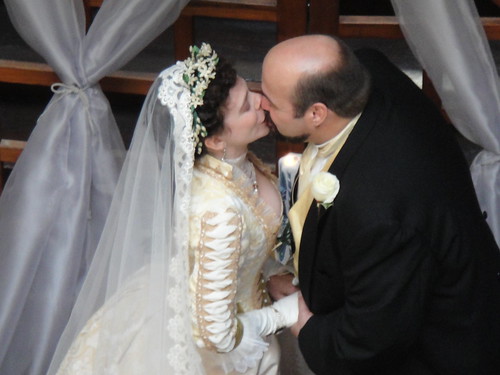
My dress, finished, and married!

The OriginalTo start this off, here are the two inspiration pieces for my dress. The first I found was the sketch which is actually a paper doll from a very talented artist, Brenda Mattox. I made a few changes to it, and proceeded to make it happen. After all was said and done, I sent my pictures of the finished piece to her, and she supplied me with photos of the original! I had no idea about how the details were managed on the original, so I made up my own plan.
The original is silk satin, and chiffon, with all the decorative trim and fringe made from pearls. Simply amazing. I am glad I didn't drive myself insane trying to recreate that!

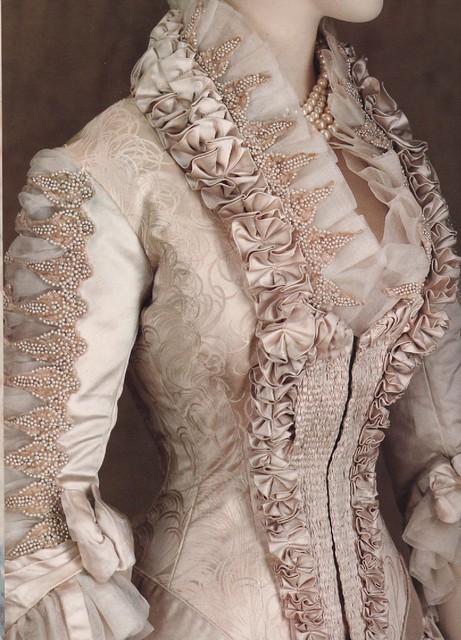
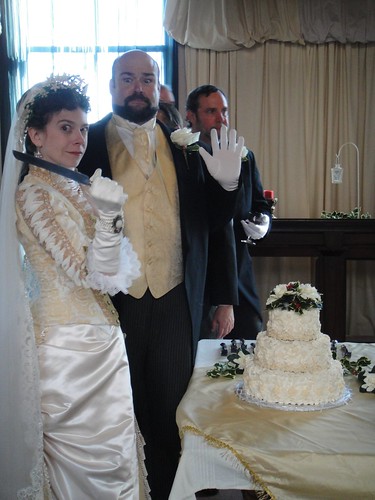
My dressI do not look good in white, so I used cream and gold as my palette. The Directoire-style bodice and train are a gold and cream cut velvet in a classic damask pattern, with an antique gold silk "vest" at front, and a pleated satin frill around the back hem. I trimmed the neckline in pleated organza and then gold point lace that ran from hem to hem on the bodice, and around the neck. The sleeves are trimmed in ruched cream chiffon with the lace edging the chiffon and tacked with-in. I have gold silk cuffs and bows at the elbow, topped with little pearl drops. The overskirt is cream satin with draped pleats and edged in a woven metallic fabric trim with cream tasseled fringe. The trained underskirt is ivory moiré with a pleated and ruched frill at the hem. There are more of the pearl drops at the top of each of the ruched panels. This was in many ways a challenge to aspects of my skill level, and a serious learning curve, since I had 8 weeks to get it done...along with 6 other dresses! I know, I am actually insane, and pearls had nothing to do with it.
So, lets get on to the making of. I will apologize now that my schedule was so tight there are just not as many fiddly pictures as might be nice. However, you can see all of them here in My Wedding folder on Flickr.
Starting with the inner most secrets!

I would have loved to have had time to make a whole new set of underwear, but it was just not in the time-frame allotted. Most of my current favorite undies are vintage, the bloomers, and princess chemise. I believe they are both Edwardian, but they are super comfy, and look great, even though no one sees them. My corset, is made from Truly Victorian, it is blue and brown teeny tiny stripes. Again, I would have liked to have a white one, but oh well...-sigh-

At this point in the proceedings our hair was all done, with an assortment of hair-pieces, all making ready for the wax flower headdresses I had made by Cheryl at A Wedding Tradition. She made all of the flowers by hand from beeswax and formed all the headdresses and corsages for my attendants, and my tiara. I LOVE them, and they all came with decorative boxes as heirloom keepsakes. She's amazing, and so thoughtful. There were all kinds of extra goodies.
The rest of the underwear was a train-supporting bustle based off the Laughing Moon pattern and my petticoat made from the TV pattern.
The next bits that went on, before actual dress pieces was my jewelry. My dear friend Allyson Giesen made all of it for me. The two necklaces are based off of more Edwardian pieces like Queen Mary wore in this picture. All made of crystal beads, sterling, and natural pearls. I adore them. They do not adore my neckline on the bodice, so the ball top I make for next year will will be more open so that they do not eat my neck. I also wore my mourning locket which has some of my mom's hair and her picture in it, as well as her rosary, that my Aunt brought for the occasion. That is the draped pieces over my heart.
The dress part one: The Underskirt

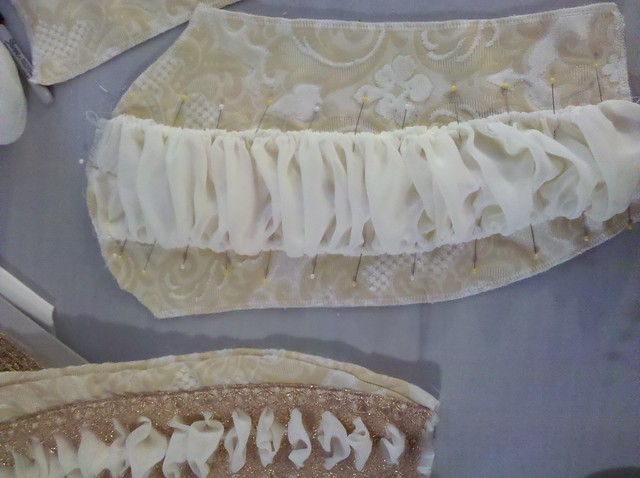
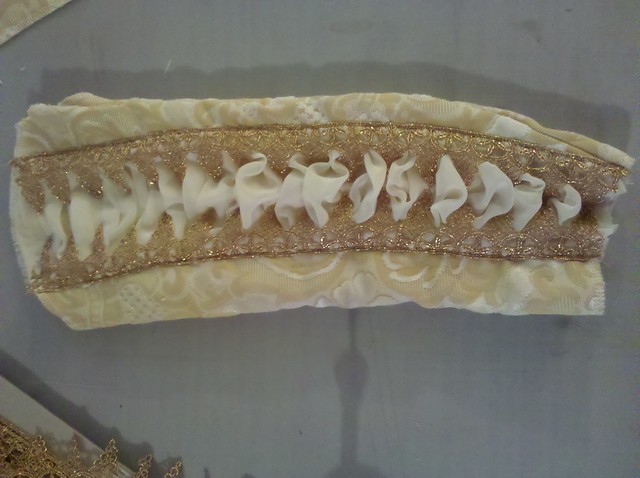
The underskirt I ended up with was actually the second. I know, at the time I was finally making my dress, I had a week and a half to do it. So, screwing around with a different underskirt sounds ludicrous, but the first one just didn't work. It was made of ivory taffeta, which turned out to be too sheer, and I was really trying to match the sketch with its pleated front. FAIL! It took forever, and then just wouldn't lay right, and I couldn't carry the treatment around the back, so I scrapped it. The second attempt which was finished in half the time, is just straight ivory moiré. It is the TV Fan-tail skirt, with no alterations. That doesn't happen often, but for the sake of time, mine and all my girls had the same underskirt with slightly different trimming. My trimming was 11 inches of knife pleats interspersed with 11 inches that got all gathered together into 1 inch. Over this inch, I placed one of these lovely little beaded pearl drops.
Underneath all this I edged the entire skirt in a tight knife pleated trim that only shows about 1/2 inch.
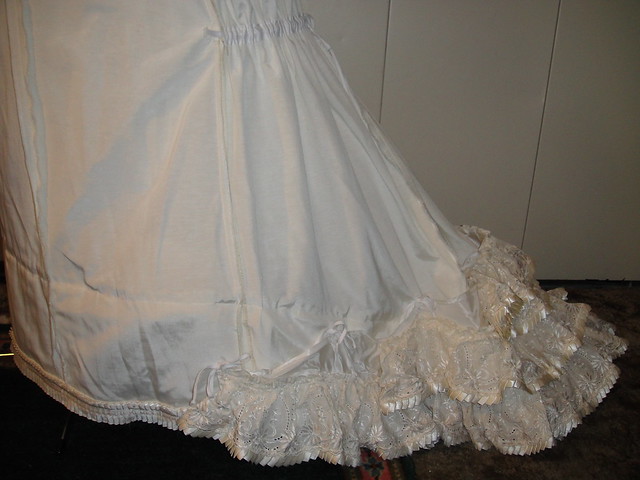
Also, thanks to YWU's article on balayeuse, I and all my girls got one. I made them to tie in, and they come right out for washing. They have to be about the coolest things ever! They added such weight to the skirt, and they looked awesome dancing. We did have to figure out how to carry the trains while dancing, but we sure looked good!
The dress part two: The Overskirt
Oh the overskirt was fiddly! It also took two tries, because the first time I apparently, needed a learning experience, and laid it out, pleated it...flat, and sewed on it for 7 hours. They looked great flat. UGH! It has to go on a round person! So I took it apart. -sigh-
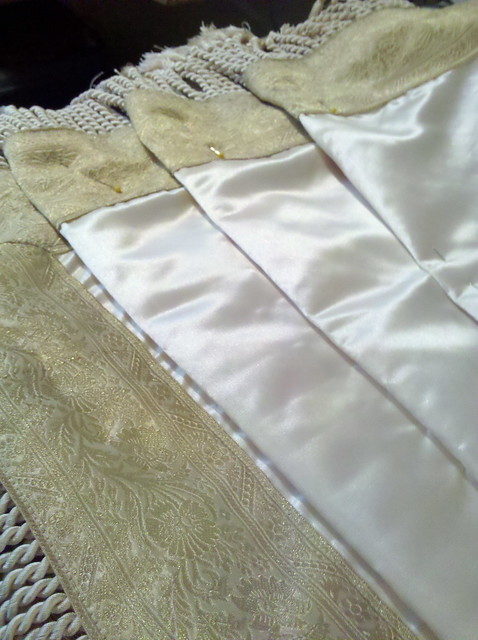
The front is double layers of the heavy bridal satin because I wanted the pleats in front to look thick and heavy. The tassel trim really helped, too. It kept all that satin from curling, especially on the open side.

This time i draped the skirt around the form, and hand tacked all the pleats so they would stay. This time it worked much better. I put an adjustable tape at the seam on the closed side so I could adjust the amount of ruching when I had it on. Inadvertently it looks great down, too. :-)
I have a huge weak spot for asymmetrical Victorian dresses, and this overskirt definitely let me play with that look.
The dress part three: The Bodice

As I mentioned above, it is in the Directoire-style, that kept popping up through dress history. I figure it must be because they are so much fun to wear. You get the fitted look of the basque at the front and the fun and drape of a skirted back.
The bodice took less time, and was much easier than either of the skirts! Trimming it was a little fiddly, because I had some really specific ideas of how I was was going to recreate the fashion plate I was using.

I really liked the look of the trim on the sketch going up and around the neckline with the pleated frill. The only issue was my lace wasn't stiff enough, so I stitched all those little points down by hand.
Now the sleeves, I am really excited about. They did exactly what I wanted them to do, and as one of the last things I did, the only part that actually got documented in progress.
I cut the sleeves to be elbow length on all the dresses, because my intention was to make the girls dinner dresses, and have them actually be able to wear them again. Which of course they did on Saturday night at the costumed dinner.
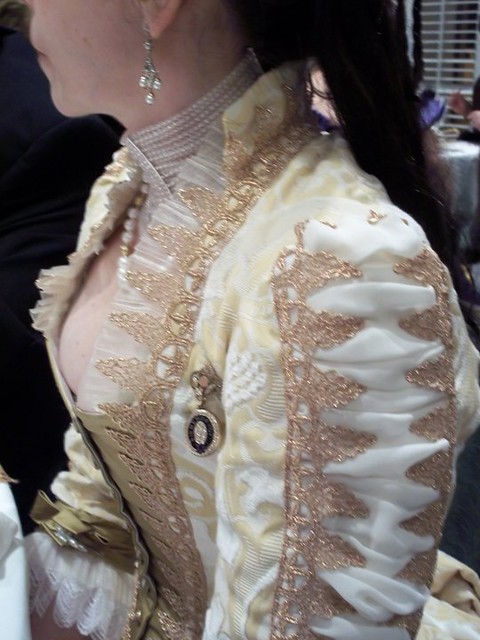
On the wrong side of the fabric, I arbitrarily drew where I thought the design should go, but it looked like it was going to work out, so I machine-stitched over them so to see my lines on the velvet side. I then ripped a chiffon strip the length of the fabric, and about 5" wide. After serging it, I basted up both sides to make my rouch.
Fitting the rouch was fairly easy. Once the length was set, I combed the ruching out so it would be more or less even, and turned the edges under, pinned my trim on, and stitched it down!
The gold trim again had to completely tacked down by hand, but where it got close enough together, I was able to tack them to each other and let the chiffon poke through how. I got more comments on the sleeves than almost any other part of the dress. Probably because they looked complicated, even though they were the only part that went off without a hitch. My mom used to tell me that the most simple thing can take the longest. That was certainly the truth!
After they were all stitched together, I added a combination of pleated frills under the cuff of gathered silk. I then folded some bias strips and whipped out some little flowers and stitched those down with more of the pearl appliques. I should have stitched the "petals" up against the sleeve, because the kept falling. I'll fix this soon. Love how all the extras worked out.
The dress part four: The Veil
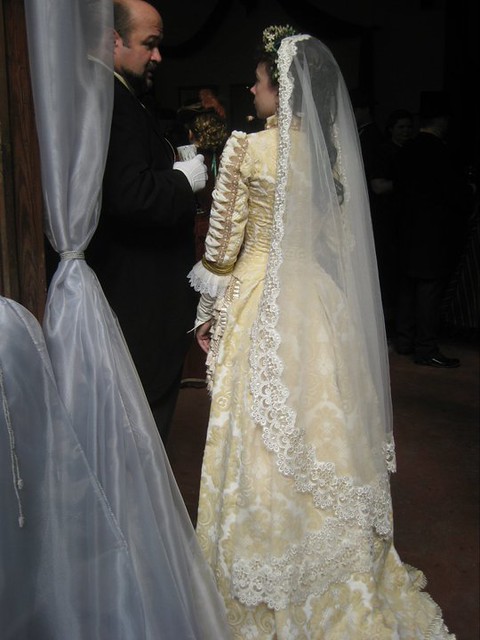
Over all this went the mantilla-style veil, which was the LAST thing that got made because I kept forgetting about it. The lace for it had originally been 10 inches wide, because I am a glutton for punishment. That lasted all of 4 minutes worth of trying to get it to curve, and I cut it apart. The finished side that I used is 4.5 inches wide, and much more manageable. The other side will get saved and used on something else...eventually.

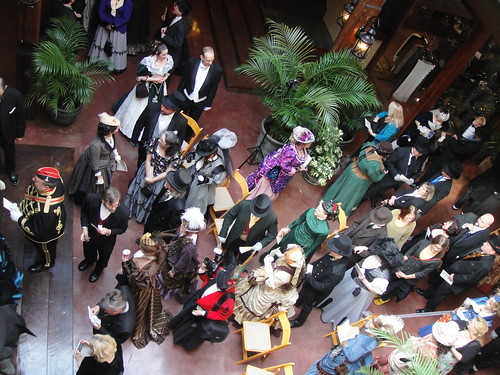
Here are some random shots from the wedding. If you are interested in ALL of them feel free to view my galleries on Flickr and my Wedding Stuff set(which is the in progress pics), and the Unofficial Wedding Photograph set, which has piles more hilarity. If you're my friend on Facebook, you've had plenty of that, and a ton more photos.


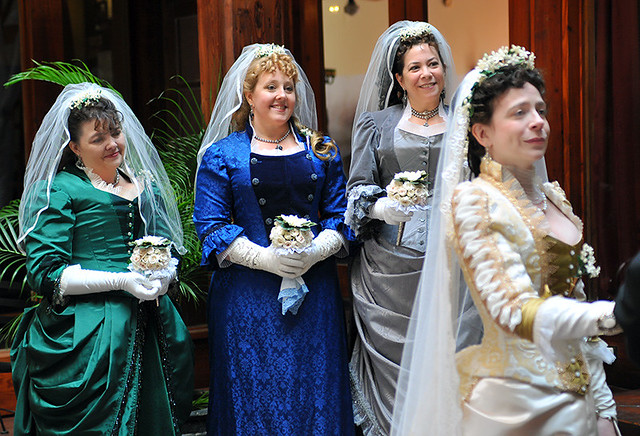
That's all there is about me, and my dress, so next up, The Girls!
~Cheers!