The Seamstress wants a new dress!
I have wanted this dress for years! I first drew sketches of how I thought the pieces would look back in 1999. I love this dress. I love everything about it from the fashion plate and description.
Here is the Description:
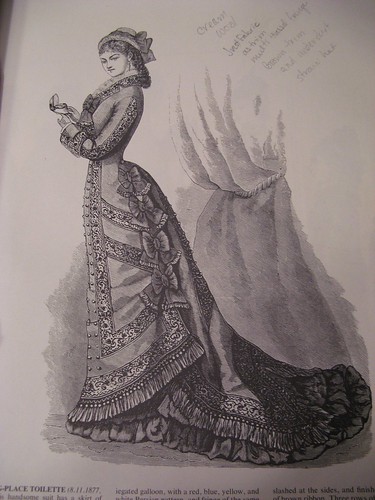
“Watering-Place Toilette (8.11.1877,p. 508).
This handsome suit has a skirt of dark brown gros grain, trimmed on the bottom with two gathered flounces. The Breton polonaise of cream wool is trimmed with variegated gallon, with red, blue, yellow, and white Persian pattern, and fringe of the same colors. The rolling collar is formed of the same galloon, which likewise trims the cuffs and seams of the sleeves. The polonaise is slashed at the sides and finished with bows of brown ribbon. Three rows of pearl buttons are set in front; the back is also ornamented with buttons. Tuscan straw hat, trimmed with brown ribbon, with a rouche inside the brim.”
I do not usually try and reproduce fashion-plates. I like to take elements from several, and create a unique dress, but I wanted as close to the same exact dress as I could get.
I tried and tried to duplicate the trim, and failed. I finally stumbled across a patterned fabric at a store in Pittsburgh in 2007. It was striped with small motif patterns, and I thought perfect to cut trim from. I bought all they had at a steal; 5yrds= $5. Tee Hee! Everything fell together from there. I found the perfect cream wool and matching tassel fringe at SR Harris in MN. My friend Denise Giesen sold me some silk in a cross-woven rust green, and the last piece was the straw hat. Heather McNaughten made it from TV.
I decided to use the teagown pattern from Truly Victorian because it looked like the perfect shape. The teagown that I made myself for Dickens 2007 was that pattern, and it gave me practice on how to manipulate it.
So I decide to make this dress with only a week to do it in, so I can wear it at the Dickens Fair in San Francisco, CA. Idiot! I only took a couple of short cuts, and only one of those do I wish I had done different. I am fine with how all of it turned out, but with more time…
Ok, so here goes, the cream dress.
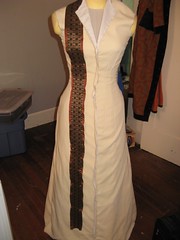
So this is a mostly finished cream dress, and a piece of the trim I was contemplating. I had considered cutting all the “ribbon” on the bias, thinking that would make it easier to work with, but I am glad I didn’t. The trim was described as ribbon, so it was actually easier to manipulate it as if it were ribbon and cut it all on the straight of grain. Since the edges weren’t finished, I decided it would be cool to use some of the silk as edging. Originally I was going to do piping, but instead did a flat piping about 3/8″ wide. I wish I had done the piping. I did not have enough cord or time to make the piping, everything I DID do was tedious and time consuming enough. The piping though would have laid along the curves of my body better. The flanges had a tendency to flip in if I was not careful about where I put them. Oh well, live and learn.
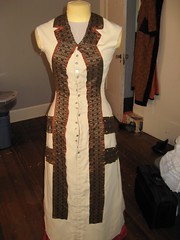
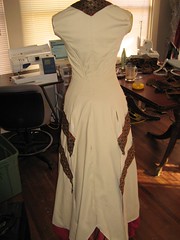
The front of this dress was the hardest part. I could just not see exactly how it was shaped, and how all the trim and the trim that makes the collar were all going to come together. It took a day of trial and error and two collars to figure it all out. My first go was a pieced turned collar that was partially built into the edges of the front. Well this did not work at all! with the trim from the front. So then I caught on to where it said, ” the rolling collar is fashioned of the same galloon,” Duh! So, I notched 2 pieces of trim, and tries it out with that. Worked much better, and I could blend the trim together with the collar at the front closure. Although I did have to cut the neck back to a V-shaped neckline to do it. This would be when I realized that the ribbon on the fashion plates chest would serve a purpose; to hide the awkward transition between collar and front trim. Voila!
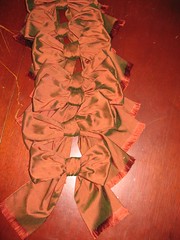
I made a pile of these bows. I made them of the same silk as the edges and the flounces on the skirt. They are tubes, and I fringed the ends. I love them very much, even though THEY were really tedious. Silk is such small fibers it took forever to fringe.
Placing the trim was entertaining, and took some doing. I became very adept at the mitered corner.
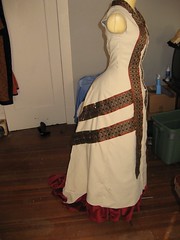
The first picture shows the corner that the collar made, and the second is the first go as placing the side bands.
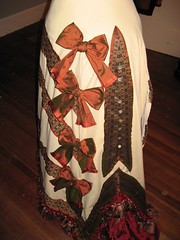
Again shaping the back piece took awhile, but I just worked and worked two pieces of trim until I got it to lay right. More mitering and some buttons later that cute little arrow is on. This is also the first placement of the bows to see if I like 4 or want to only 3. I stayed with the four of them
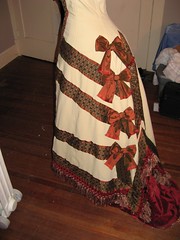
I was pretty crunched for time from this point on, so did not take any pictures of the underskirt making or the wrestling of the tassel fringe. I used the underskirt from my ball gown for much of the making because it was done. I actually like the way it looks, and may wear it with the polonaise some time. Holy Crap the tassel fringe! It is soooo heavy! I used it to hem all my edges turning it so the head of the fringe was to the inside, but getting to take corners was a fight. It also makes the edge of the polonaise so heavy that it tends to crush the silk underskirt. I used some pretty frilly petticoats to make it behave, but I think that may be part of why the ball underskirt works is it has so much more body. The sleeves with the trim on the seam went great but figuring out the cuffs was fun. Here is pic nearing completion with the sleeves pinned to the dress form, and more of the pleated organza pinned in to see if I would like it as the neck frill…I did.
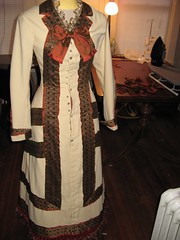
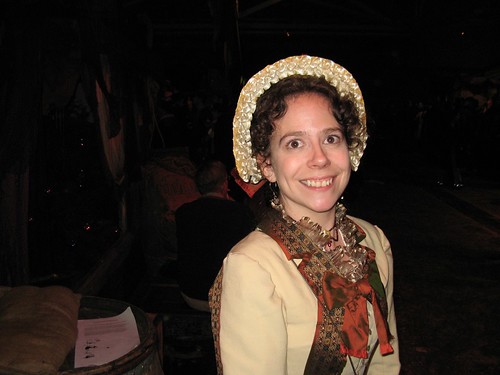
I got the bonnet the very last week I was at TRF, and did nothing with it till the morning I left for San Antonio. Luckily it was very simple. I made a sash of silk that I twisted around it; looped and tucked the two ends so it looked like another bow, and put the finished bow over that. I was undecided how to finish the interior. It said finished with a rouche, but I did not have the time to make an entire band, rouche it, and stitch it in. So I used some of the double box pleated organza trim that I had picked up at Golden D’or in Dallas. It is 2″ wide, and I only needed I row of it around the edge. You cannot see the interior at all when I have it on. I will make a rouched piece of cream silk to go inside as lining because the straw catches my hair, and pokes me in the head, but it was worth all that to wear it in CA. I will finish it now that I have gobs of time.
One of the last thing I did was the Buttons down the front. I wanted it to look like I had to button all those little finger-numbing buttons but I really only needed them to function to hip level. I still made all the button holes all the way down, but left the last 2/3rds closed and stitched down.
I poked holes with my awl, and pushed the shanks through, re-curling the metal shank over the fabric. Had I been able to find small Mother of Pearl button with carved shanks this would not have been an issue because they are so much lower, but I could not. I did find some very pretty pearl button with a metal shank. They are disks of pearl with a pin shank that looks like a small silver dome on the front and a looped shank on the back. I have not yet put the other two rows down the front either. I am not sure I will. I will play with how it look first. Might make it too busy fro me. I was unsure about that part from the beginning.
The only other thing that I changed was the draping of the sides. This is where my choice to not use piping really showed. I could not pull up the front of the splits and have the trim still look good; it would fold forward and looked awkward. Also, no matter how I pulled or where I put the pleats, it never looked like the plate. So I just decided to write it off to an artistic, but perhaps not practical design element.
Well there you have it! That is the making of my new polonaise. and here are the photos of me in it.